DIY Lip Balm: Easy, Natural, and Homemade Lip Care Recipe
Another day, another one of Grandma’s go-to creations. This time it's her signature DIY lip balm recipe, along with a few of my favorite blends I’ve picked up along the way.
Since I was little, homemade lip balms have always been a quiet but comforting ritual in my routine. Whether it was my grandmother smoothing a bit across her lips and my lips before heading into our sunny terrace garden or my mom pulling out a tiny tin of homemade lip balm from the depths of her bag, I grew up understanding how essential it is to care for the delicate skin on our lips.
Lip care is more than cosmetic. It is nourishment, protection, and self-care, all in one silky swipe.
Lip balm, to me, is one of those little luxuries that just feels good. Not in a flashy, over-the-top way, but in the simple, "this moment is just for me" way. And when you make it yourself, that joy multiplies.
Just like whipping up a batch of homemade face scrub or mixing your own hair mask, creating your own DIY lip balm lets you skip the questionable additives, artificial dyes, synthetic fragrances, and petroleum-based ingredients you can't pronounce. Instead, you create something clean, comforting, hydrating, and completely your own. A buttery-smooth, ultra-nourishing little pot of goodness that smells incredible and feels even better.

There's something wildly satisfying about whipping up your own beauty products, especially when they're as easy and indulgent as lip balm. Making your own balm is a mini ritual that reminds you to slow down, to blend, melt, and pour with care.
It's like a warm hug from your favorite person in the world, the kind of simple, sensorial DIY that instantly feels like an act of love. And the results? Pure magic!
Whether you're soothing dry winter lips, adding a flirty summer tint, or prepping thoughtful handmade gifts for your besties, our easy DIY lip balm recipe has you covered.
So today, I'm sharing everything you need to know about how to make lip balm at home, including the best DIY lip balm base recipe, my grandmother’s original recipe, and some of my absolute favorite lip balm blends. We'll answer some of the most frequently asked questions about this DIY and share tips on what to do (and what not to do) to get homemade lip chaps that are deeply moisturizing and can even be gifted (if you don't end up keeping them all for yourself!).

Why Make your Own Homemade Lip Balm?
Let's start with the why.
Our lips are more vulnerable to dryness, flaking, and cracking because they don’t have oil glands like the rest of our skin. The skin here is thinner and more delicate, making it especially sensitive to the elements, whether it’s cold weather, wind, sun exposure, indoor heating, or even salty snacks. That’s why extra care is essential, and what you put on your lips truly matters. A nourishing DIY lip balm can make all the difference.
A good lip balm works to seal in moisture, protect from environmental damage, and deliver deep hydration.
Store-bought balms promise hydration, but many are packed with drying ingredients like alcohols, synthetic fragrances, or petroleum derivatives that can do more harm than good, and make dryness worse. Ever feel like the more you apply your lip balm, the drier your lips get? You're not imagining it.
With a homemade lip balm, you know exactly what's going into your formula. When you make your own balm, you get to choose every ingredient. Think plant-based butters like shea or cocoa, nourishing oils like jojoba or almond, healing extras like vitamin E or chamomile, and even add fun flavor or tint combinations.
You can make it as simple or as luxurious as you like. And best of all? You can share everything on the ingredients list with your bestie.

When Should You Use A DIY Lip Balm?
Honestly? As often as your lips need a little love.
I personally apply it first thing in the morning, always after exfoliating my lips with a DIY lip scrub, and again before bed as part of my wind-down ritual. During the summer, I'll layer it on before heading out for a beach day and reapply before actually going into the ocean or the pool, it helps protect against saltwater and sun.
If I'm wearing lipstick, I always dab on a thin layer first for a smoother, more hydrated base. On barefaced days, you can reach for one of my tinted recipes, it gives just the right amount of glow to feel polished and put-together without trying too hard.
DIY Lip Balm Basics: Ingredients and Ratios
Most DIY lip balms recipes follow the simple ratio or basis below. You can prepare yours based on this, or follow my grandmother's original recipe that didn't have beeswax or any alternatives, since we only had access to a few very natural ingredients back then.
DIY Lip Balm Ratio:
Use a simple 1:1:1 ratio as your base
⅓ Beeswax (or a vegan alternative like candelilla or carnauba wax)
⅓ Butter (such as cocoa butter, shea butter, jojoba butter or mango butter)
⅓ Oil (like coconut, almond, jojoba, or olive oil)
Tip: I usually add a little extra butter for richness and just a touch more oil than butter for a softer, glossier finish. The wax helps your balm hold its shape and acts as a moisture sealant. The butter brings that creamy, rich texture. The oil provides slip and hydration.
Lip-loving ingredient staples for your DIY Lip Balm:
Beeswax: The magic that gives balm its firmness. It locks in moisture, adds structure and a protective layer. For a vegan option, try candelilla or carnauba wax.
Coconut Oil: Lightweight, ultra-moisturizing, and antibacterial, perfect for softening.
Cocoa Butter or Shea Butter: Rich, emollient, and creamy. These butters deeply nourish and repair, perfect for healing dry lips.
Jojoba or Sweet Almond Oil: Lightweight, skin-friendly oils similar to your skin's natural oils.
Vitamin E Oil: An antioxidant that extends shelf life and promotes healing.
Essential Oils: Peppermint for a cooling effect, lavender for calm, citrus for a zesty mood boost.
Natural Tints: Natural Beetroot juice, Beetroot powder, hibiscus powder, cocoa powder...

What you need to Make Your own lip Balms at home?
Making a DIY lip balm is quite easy, I even find it relaxing. Having some modern equipment (like this double boiler) helps, but while I was growing up, we used the old method of just a pot and a heat-resistant glass bowl.
Here's what you can keep on hand to make the preparation easier:
Heat-resistant glass bowl over a saucepan or double boiler
Small mixing spoon or whisk
Lip balm containers: tins, tubes, or glass jars
Small funnel or dropper to make pouring easier
Paper towels (because spills happen)
Pro tip: Many people repurpose their old lip balm containers (just clean them thoroughly!). I personally use these small glasses or a mini tin for myself and gifting, and I try to stay a bit away from plastic tubes. When using tubes, I use these paperboard ones, although they're less likely to work for more than 3 uses.

How to Make Chapstick: Your Base Recipe
This is my go-to, customizable formula when I use beeswax pellets. Think of it like your favorite pair of jeans: classic, dependable, and easy to dress up or down.
Easy DIY Lip Balm Base Recipe
Ingredients:
2 tbsp beeswax pellets
2 tbsp cocoa butter
2 tbsp sweet almond oil
1 tsp vitamin E oil
Optional: 3 drops of essential oil (peppermint, lavender, vanilla, etc.)
Instructions:
Set up a double boiler: Fill your pot with water and place a heat-safe glass measuring cup or bowl on top.
Add the beeswax pellets, shea butter, and coconut oil to the bowl. Heat over low, stirring occasionally until fully melted.
Remove from heat. Stir in the vitamin E oil and add the drops of essential oil.
Pour into small lip balm jars or tubes while still liquid.
Let cool and harden at room temperature for about 30 minutes.
Tips:
If your balm is too hard, reduce the beeswax.
If the balm is too soft, add a bit more wax.
Want a glossier finish? Increase the coconut oil slightly.

My Grandma's Original DIY Lip Balm
Some recipes are more than just a mix of ingredients, they're rituals. Memories. Time capsules.
My grandmother's lip balm is exactly that.
Before I ever melted my first batch of homemade lip balm or learned what "carrier oils" were, I had already fallen in love with the ritual of lip balm, thanks to my grandmother.
She never measured in tablespoons or used the word "infusion," but she knew how to create something healing with whatever she had in the pantry. For her, it came naturally like simmering cinnamon sticks in water on the stove or tying a ribbon in my hair before school.
Her balm always started with cocoa butter, rich, velvety, and warm like a hug. She'd melt it low and slow, stirring in the oils. Sometimes, on special occasions, she'd add a whisper of cocoa powder, just enough to deepen the color and scent. And always kept the balm in a tiny box tucked into her pocket, right next to some café con leche candies.
To me, this recipe smells like her hands. Like comfort. Like the promise that no matter how warm the air was or how chapped my lips got, she'd always have something that made it better.
This recipe brings me comfort in every season, from dry winters to sun-soaked summers. I hope it brings you the same! To this day, I still make this homemade lip balm almost exactly as she did to honor the warm kitchen scents of home, my grandma’s laugh, and the kind of love I learned growing up in Cuba, the kind that lives in the little things.
Grandma's Original Homemade Lip Balm Recipe
Yield: About 5–6 small lip balm tubes or tins
Ingredients:
2 tablespoons cocoa butter
1 tablespoon castor oil
1 tablespoon mint-infused oil (see note below)
Optional: ½ teaspoon cocoa powder
Optional: ½ teaspoon vitamin E oil
Note: To make mint-infused oil, my grandma used fresh mint leaves from the garden and castor oil. Start by washing and thoroughly drying 1 cup of fresh mint leaves. Blend the leaves with 1/2 to 1 cup of cold-pressed castor oil until the mint is finely shredded and the oil turns a vibrant green.
Pour the mixture into a glass jar and let it sit in a cool, dark place for 24 to 48 hours to naturally infuse. Once ready, strain out the solids using a fine mesh strainer, and store the finished oil in an airtight container. Use within 2 to 3 months for maximum freshness.
Instructions:
In a heat-safe bowl or double boiler, combine the cocoa butter, castor oil, and mint-infused oil. Warm over low heat, stirring occasionally, until completely melted and smooth.
Remove from the heat.
If using, whisk in the cocoa powder for a subtle tint and aroma, and vitamin E oil for extra hydration and shelf-life.
Carefully pour the balm mixture into clean tins or tubes. Let them cool at room temperature for 30–60 minutes, or until fully solidified.
Once set, cap your containers. Store in a cool, dark, and dry place.
Tips & Tricks:
Customize your base oil: While the mint infusion can be made with many oils, jojoba or sweet almond work beautifully for sensitive skin.
Smooth blending: Sift your cocoa powder before adding to prevent clumping and ensure a smooth balm texture.
Flavor boost: For more minty oomph, add 1 drop of food-grade peppermint essential oil (optional).
Shelf life: Adding vitamin E not only soothes lips but helps prevent oxidation, keeping your balm fresh for longer, usually up to 6 months.
Easy DIY Lip Balm Recipes to Make at Home
After falling in love with my grandma's DIY lip balm, I couldn't stop experimenting with new blends. Some recipes are rooted in nostalgia, others were born out of pure curiosity (and a few kitchen mishaps!). These are my go-to lip balm recipes, the ones I make on repeat, gift to friends, and keep stashed in every handbag. Whether you're after hydration, a subtle tint, or a glossy finish, there's something here for every mood.
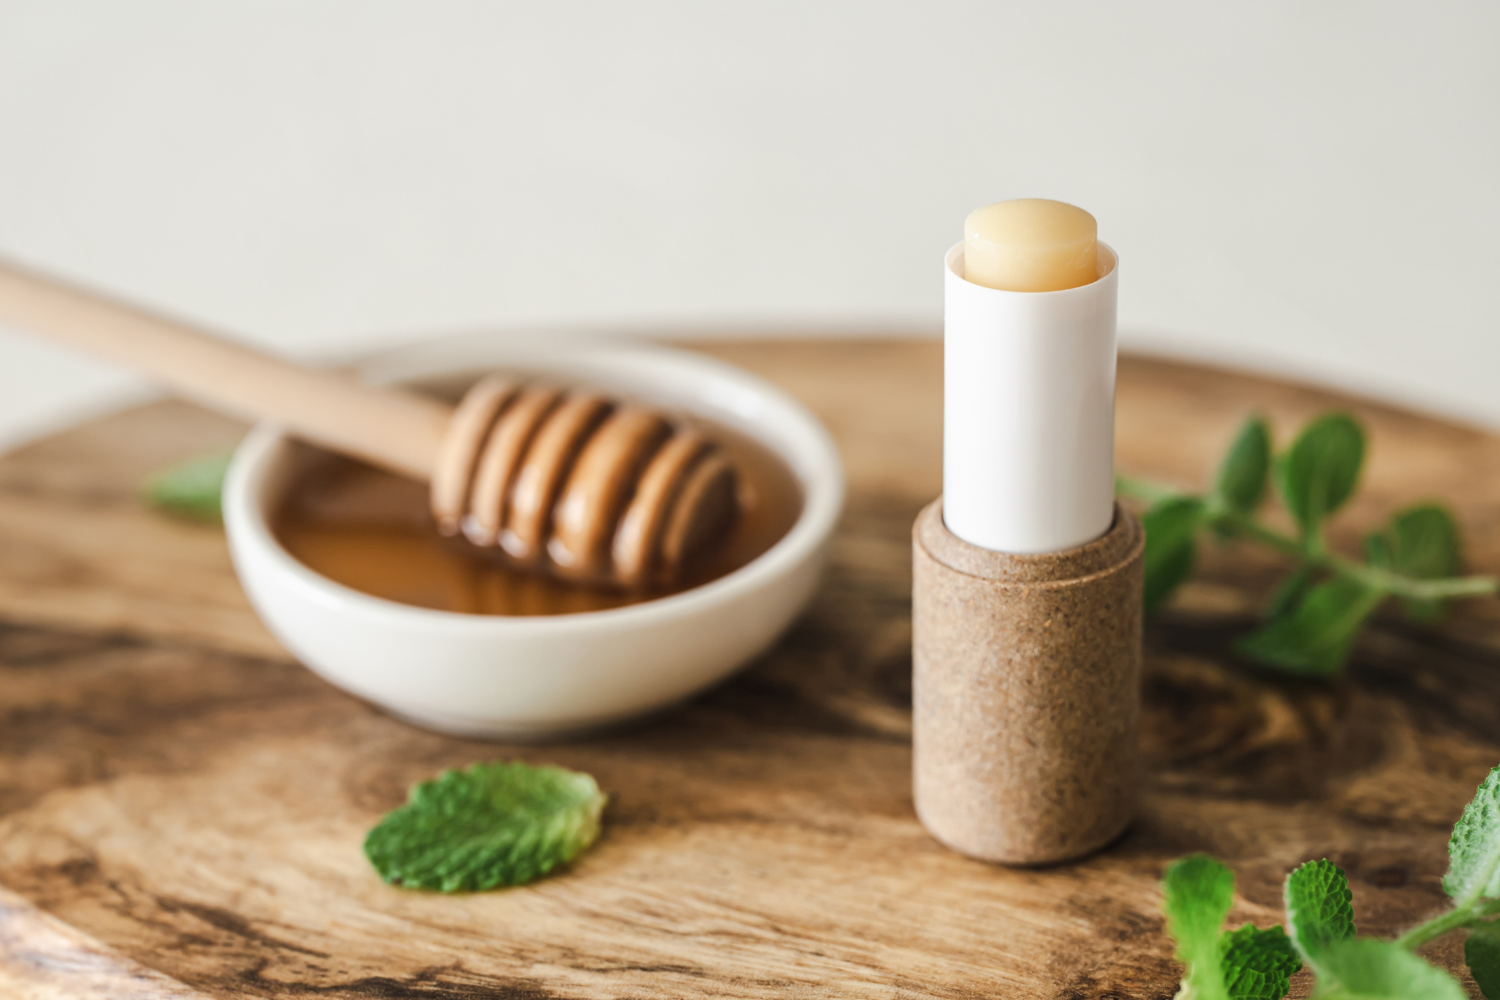
Classic Coconut & Honey Lip Balm
This is the first lip balm I ever made on my own and the one I always come back to, besides my grandmother's original one. This coconut and honey combo smells heavenly, feels silky, and lasts forever on the lips. Coconut oil adds deep moisture, and raw honey brings antibacterial properties (plus a subtle sweet taste!).
1 tablespoon beeswax pellets
1 tablespoon coconut oil
1 tablespoon cocoa butter
½ teaspoon raw honey
Optional: 2–3 drops vanilla essential oil
Melt the beeswax pellets, coconut oil, and cocoa butter in a heat-safe bowl or double boiler over simmering water. Once fully melted, stir in the honey. Remove from heat, add essential oil, and pour into tins. Let it sit for 1–2 hours.

Rose-Tinted Lip Balm
This one is dreamy. The rose-infused oil gives it a light floral scent and the beetroot juice gives it a natural pink hue. It's perfect for date night or just romanticizing your daily routine.
1 tablespoon white beeswax pellets
1 tablespoon shea butter
1 tablespoon olive oil (or jojoba oil)
½ teaspoon beetroot juice or beetroot powder
Optional: 2 drop rose essential oil
Use the same melting process as above. Whisk in your powder or mix in your juice and essential oil, and pour into small glass jars. Let cool completely. (Pro tip: keep it in the fridge for a firmer texture.)

Beach Lip Balm
This balm always takes me back to Cuban summers, warm skin, salt-kissed air, and sun hats. It's light yet deeply nourishing, with mango butter for smoothness and a hint of sunglow.
1 tablespoon beeswax
1 tablespoon mango butter
1 tablespoon coconut oil
½ teaspoon vitamin E oil
Optional: 1 drop essential oil (eucalyptus or sweet orange)
Melt the mango butter, beeswax, and coconut oil using the double boiler method. Once melted, add two drops of vitamin E oil and essential oil (optional). Pour into small tins or tubes and allow to cool completely before sealing.

Repairing Lip Balm
This one is for chapped, windburned, or sun-damaged lips. It's ultra-soothing, thanks to aloe and nourishing oils. I keep a pot of this by my bedside every summer.
1 tablespoon white beeswax pellets
1 tablespoon shea butter
1 tablespoon almond and avocado oil blend
½ teaspoon aloe vera gel
½ teaspoon vitamin E oil
Melt the beeswax, shea butter and almond-avocado oil blend . Remove from heat and stir in the vitamin E oil and aloe vera. Whisk gently until fully blended. Pour and let it set.
To make an almond-avocado oil blend, combine equal parts of almond and avocado oil in a glass container. Stir the oils together until fully blended. This oil mixture is rich in vitamins and fatty acids, perfect for nourishing, moisturizing, and revitalizing your skin or hair.
You can infuse the blend with a few drops of lavender or chamomile essential oil. Store in a cool, dark place for up to a month.

Orange Mocha Lip Balm (Holiday Favorite!)
This one smells just like your favorite seasonal coffee drink, sweet, zesty, and slightly chocolatey. You can use it as a thoughtful holiday gift and place it in cute tins with handwritten labels.
1 tablespoon beeswax
1 tablespoon cocoa butter
1 tablespoon coconut oil
¼ teaspoon cocoa powder
2–3 drops of orange essential oil
Begin by gently melting the beeswax, cocoa butter, and coconut oil together over low heat in a double boiler. Stir occasionally until everything is fully combined. Once melted, remove it from the heat. Blend the cocoa powder in until there are no lumps and allow the combined mixture to cool for a minute or two.
Add orange essential oil but be careful not to add too much! Pour the blend into small tins or containers, then let it set at room temperature. You can use a store-bought natural orange essential oil or create your own orange-infused oil for a more personalized touch.
To make orange-infused oil using the quick warm infusion method: Start by peeling 4–6 fresh oranges with a vegetable peeler or zester, avoiding the white pith. Dry the peels by leaving them out for 1–2 days or placing them in the oven at a low temperature (around 190°F) for 20–30 minutes until fully dehydrated.
Once dry, add the peels and a carrier oil (like almond, jojoba, or olive oil) to a double boiler over simmering water. Warm the mixture gently for 1 to 2 hours, making sure the oil doesn't boil. Strain and store in a cool, dark place.

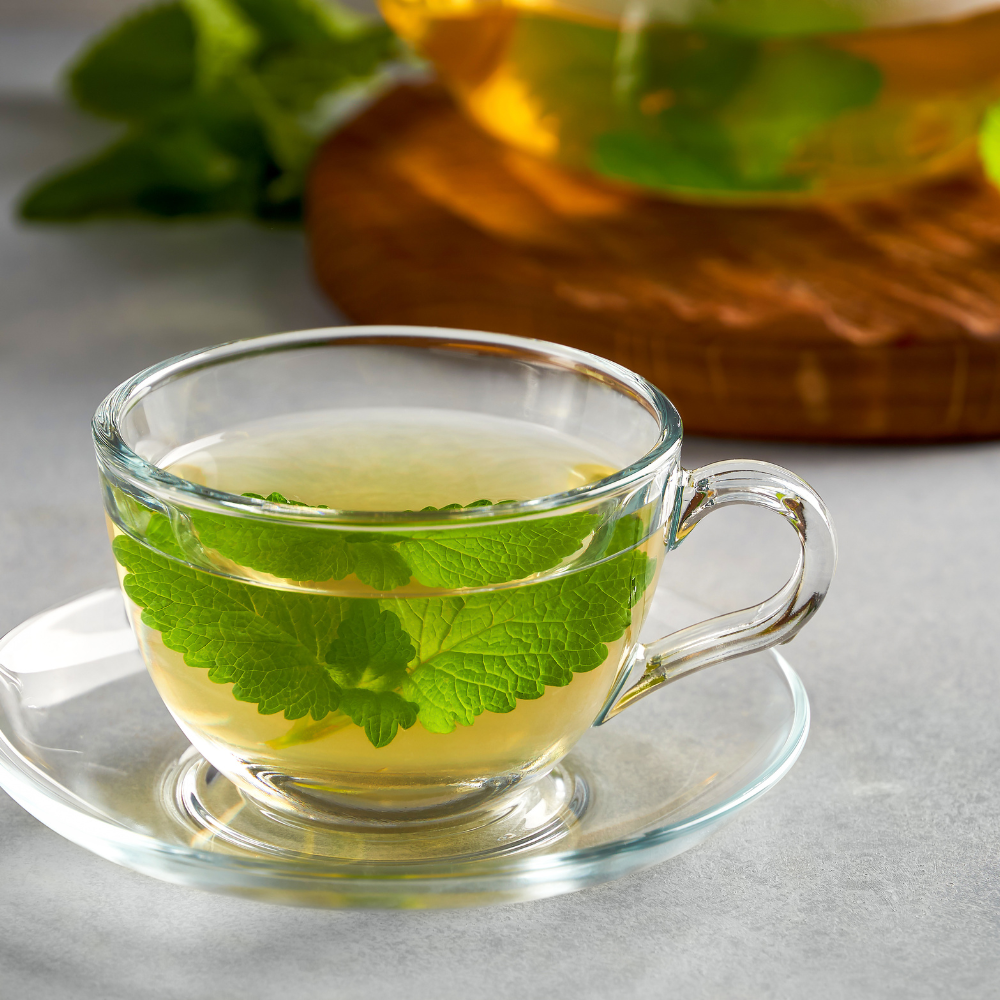
Lavender Chamomile Bedtime Balm
This one is designed for winding down. Lavender and chamomile are calming, and this balm is lovely to use before bed to help you relax and nourish your lips overnight.
1 tablespoon beeswax
1 tablespoon shea butter
1 tablespoon sweet almond oil
2 drops lavender essential oil
2 drops chamomile essential oil
Melt the base, stir in oils, and pour into a balm pot. This one has a soft, creamy consistency that melts beautifully into the lips. Keep it on your nightstand and apply as a final step in your bedtime ritual.
Berry Gloss Lip Balm (For Shine & Tint)
If you love a glossy finish but want to skip synthetic glosses, this is your recipe! It gives your lips a subtle shimmer and a hint of natural berry color from the powder.
1 tablespoon candelilla wax (for a vegan version) or white beeswax
1 tablespoon coconut oil or castor oil (for shine)
1 tablespoon grapeseed oil
½ teaspoon freeze-dried hibiscus powder
Gently melt wax and oils, then whisk in your powder. Strain through a fine mesh sieve. Pour into lip gloss tubes or small pots and let set.

FAQs + Tips for your Homemade Lip Balms
Why is my homemade lip balm too hard or too soft?
This depends on your wax-to-oil ratio. Add more beeswax for firmness, or more oil for a creamier texture.
Can I make lip balm without beeswax?
Yes! Use candelilla or carnauba wax as vegan alternatives. Just use slightly less, as they tend to be firmer.
What essential oils are safe for lips?
Stick with gentle options like lavender, peppermint, sweet orange, and rose. Avoid spicy oils like cinnamon unless they are highly diluted.
Can I tint lip balm with food coloring?
It’s not recommended, food coloring is water-based and won't mix well with oils. Instead, use beetroot powder or hibiscus powder.
Why does my balm have tiny granules?
This is likely due to cocoa or shea butter crystallizing. Try cooling your balm quickly in the fridge or tempering the butter first to prevent this.
Gifting Tips & DIY Lip Balm Kits
There's something magical about gifting something you made with your own hands. Package your balms in tiny tins with handwritten labels or eco-friendly cardboard tubes. Tie them with twine and dried herbs for that Pinterest-perfect finish.
Hosting a DIY party? Create a "lip balm bar" with bowls of pre-melted base, fun add-ins like essential oils, or flavors, and empty tubes for guests to fill and customize.
Or turn them into bachelorette favors or holiday gifts.
There's beauty in slowing down to stir and pour, in learning what your skin needs, and in choosing natural ingredients over mystery chemicals. A homemade lip balm isn't just about soft lips (though it definitely delivers that!), it's about self-care, creativity, and a little luxury you can carry in your pocket.
So go ahead. Light a candle, melt your base, and create something beautiful. Your lips (and your inner goddess) will thank you.
Share your favorite flavor blends below. Here's to buttery soft lips and the joy of DIY!
Whether you're making a few balms for yourself or creating a self-care gift box for someone you love, I hope this natural lip balm recipe(s) bring more natural beauty into your life. Just like our DIY face scrubs and lip scrubs, they're a reminder that taking care of yourself can be simple, joyful, and totally luxurious.
Now go ahead, treat your lips like royalty. They deserve it!
Disclosure: This post may contain some affiliate links and if you choose to purchase some services or products using these links, we receive a small commission at no additional cost to you. We only recommend products we would use ourselves. All opinions are our own. We participate in the Amazon LLC Associates Program.
Easy flavored iced coffee recipes to make at home, including honey cinnamon latte, vanilla oat milk latte, Vietnamese iced coffee, matcha espresso, and dirty horchata.